
How to host your frontend projects on GitHub pages for free?
A complete step-by-step Guide (with screenshots), especially written for average coders like myself!😅


Introduction:
Having a portfolio website is a great idea for a developer. We can use this website to showcase our skills, and share it with others when needed.
As a student and a beginner, we may not have the budget to pay for hosting services. Don't worry! This blog post gives you a free solution. I'll guide you step-by-step to create a simple portfolio and host it for free.
How is it possible? The answer is GitHub Pages.
Yesss! You read it right.
GitHub Pages is a service by GitHub. It helps to host any static website for free for lifetime.
Isn't it cool? Indeed, it is.
Portfolio
Now, if you don't have a portfolio template. No worries. I've got you covered.
You can download my free portfolio template. It's available on gumroad for free download. Click here to get your free copy!
Feel free to customize it and use as per your requirements.
Create Your Website
Now that you got your free template, and you have customized it as your portfolio. Place all your website files in a single folder.
Steps to host your portfolio with GitHub Pages
Before proceeding, you must be logged in to your GitHub account. If you don't have a GitHub account, you can simply create it by clicking here.
Now, let's go through steps to deploy our portfolio using GH-Pages. I've included screenshots to explain every step. If you're an advanced GitHub user, you may skip some steps.
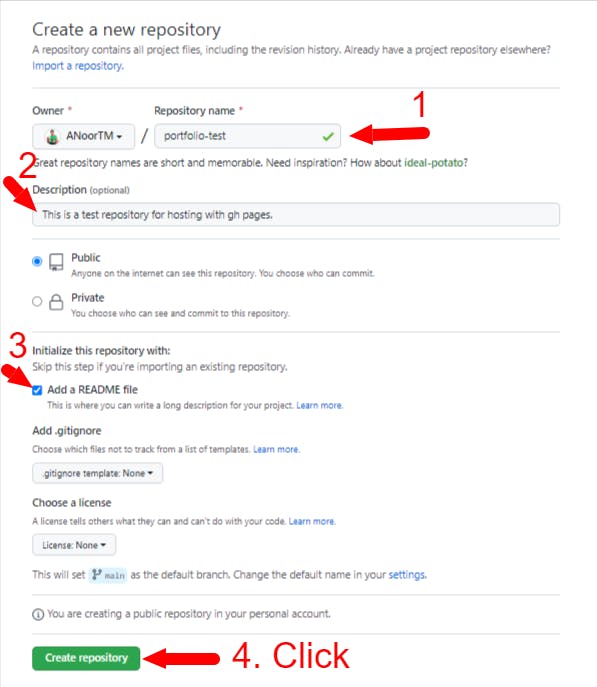
1. Create a New Repository
Click on '+' sign and click 'new repository'.

2. Fill in the details for this new repository
Repository name: I've named it "portfolio-test"
Description: Write a suitable text describes your project.
Check "Add a README file"
Finally, Click on "Create Repository"
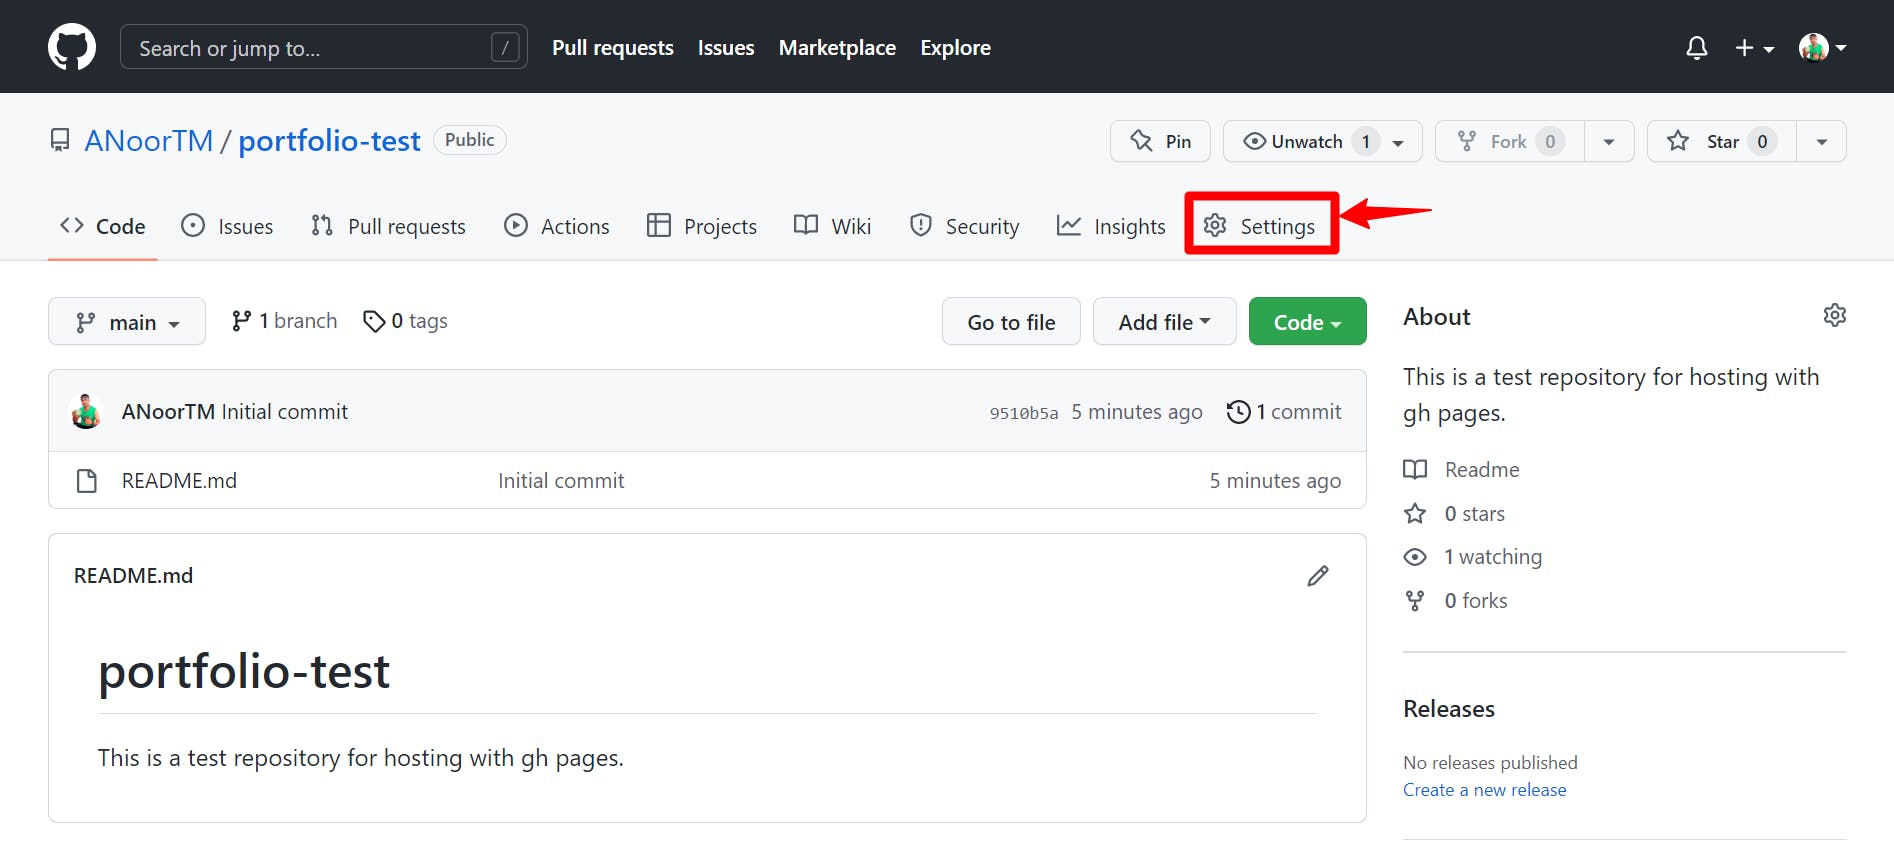
3. Prepare the "Repository" for hosting
In the next step, we have to prepare our repository for hosting our actual website. In order to do that, we have to follow these steps.
i) Go to Settings
Make sure you're in the "portfolio-test" repo, and click on "Settings".
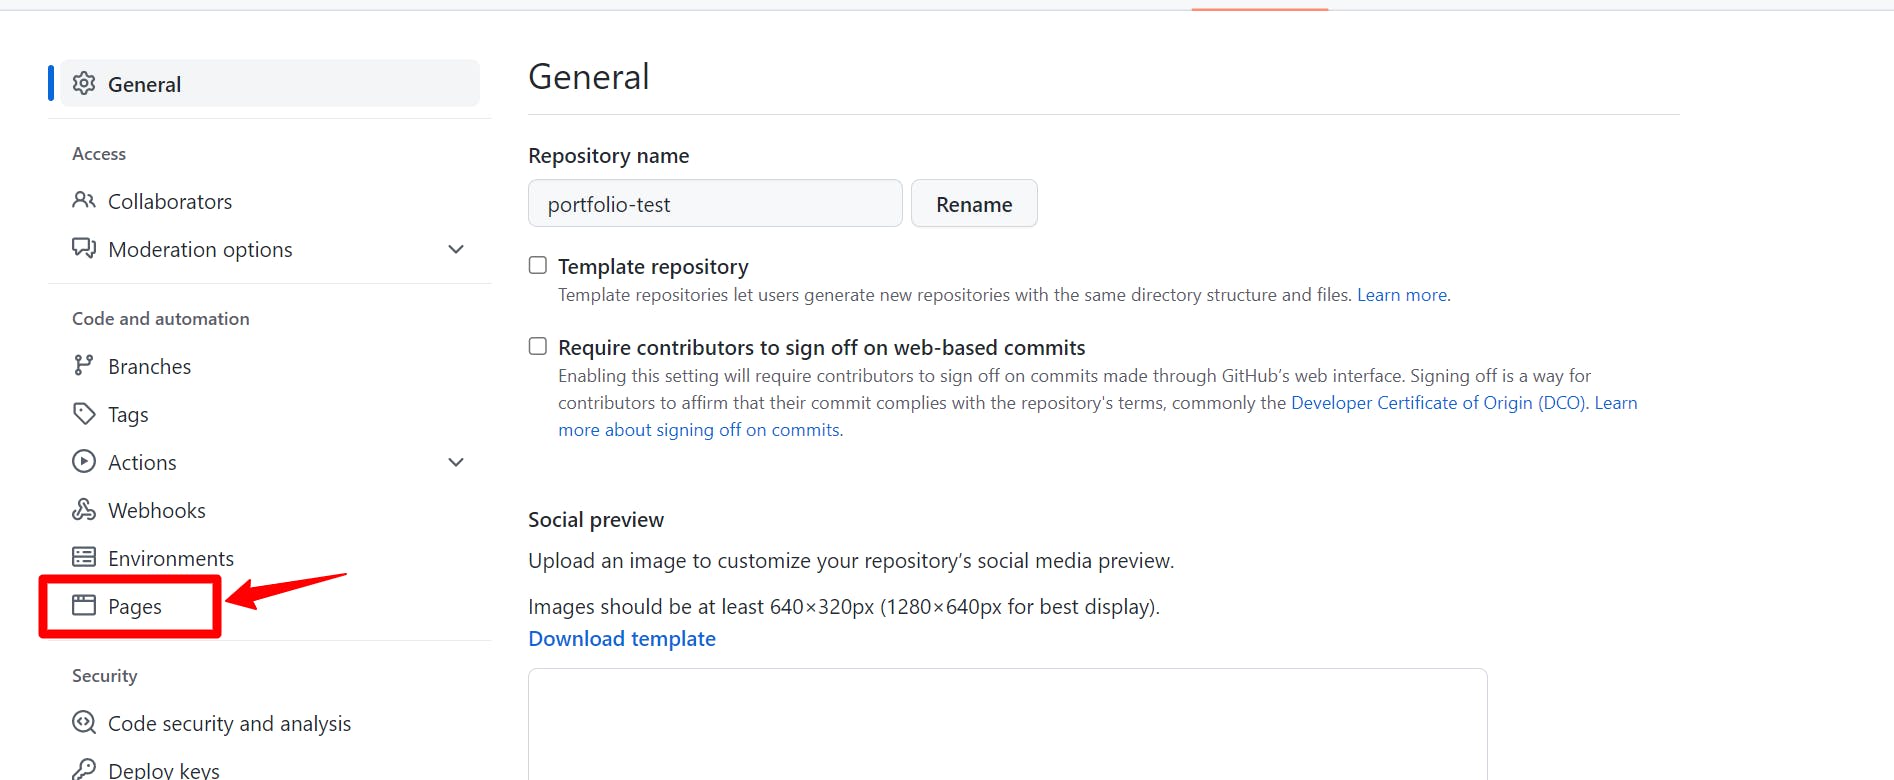
ii) Click on “pages” on the left sidebar.
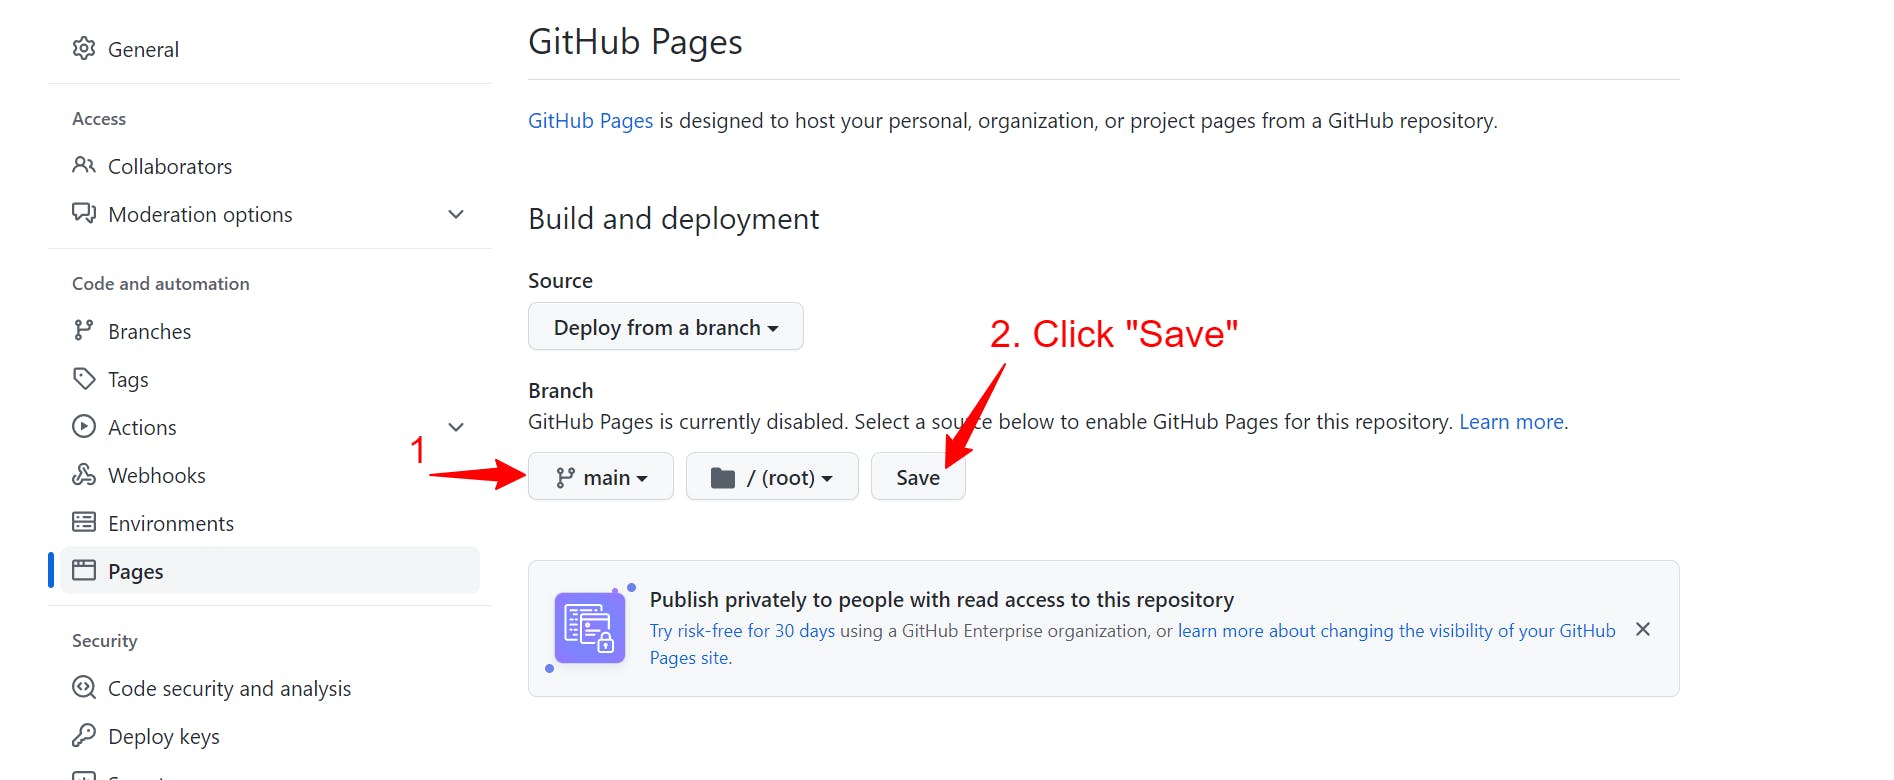
iii) Find "Branch" Setting
Scroll down a bit on GH-Pages Settings page, and find "Branch". You'll see "none" option is selected by default. Click on the dropdown and change it to "main".
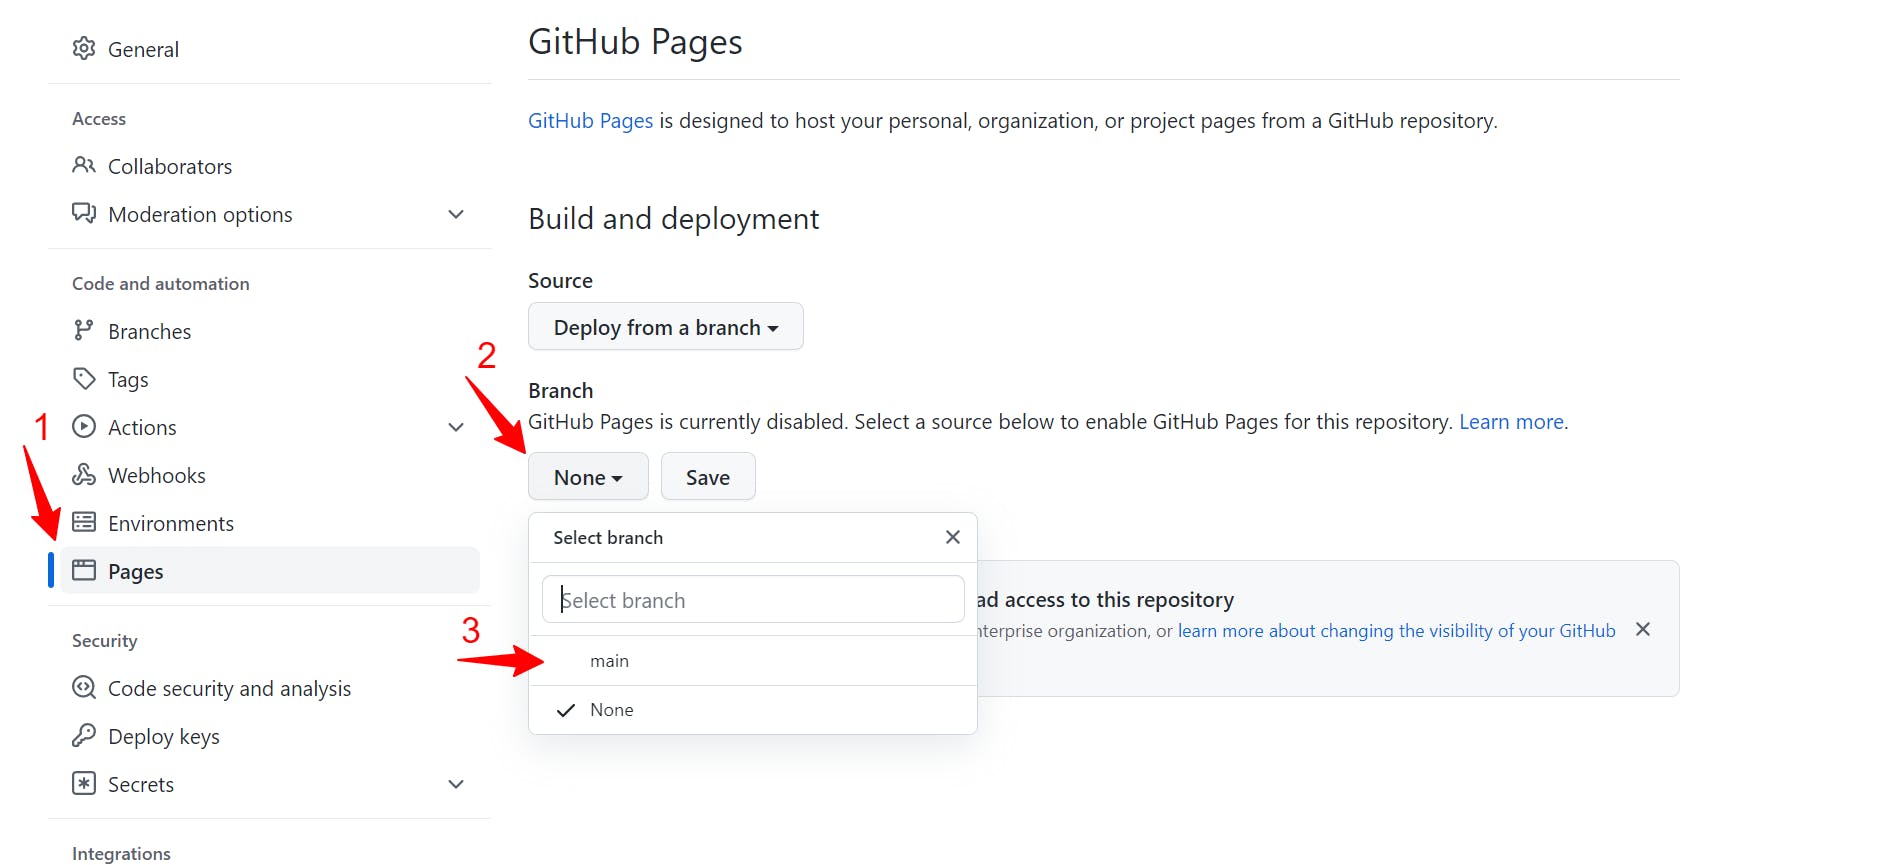
iv) Don’t forget to click on “Save”
Finally, don’t forget to click on “Save”. Congratulations! Your website just went live. You can understand "how to get your website link" in the next step.
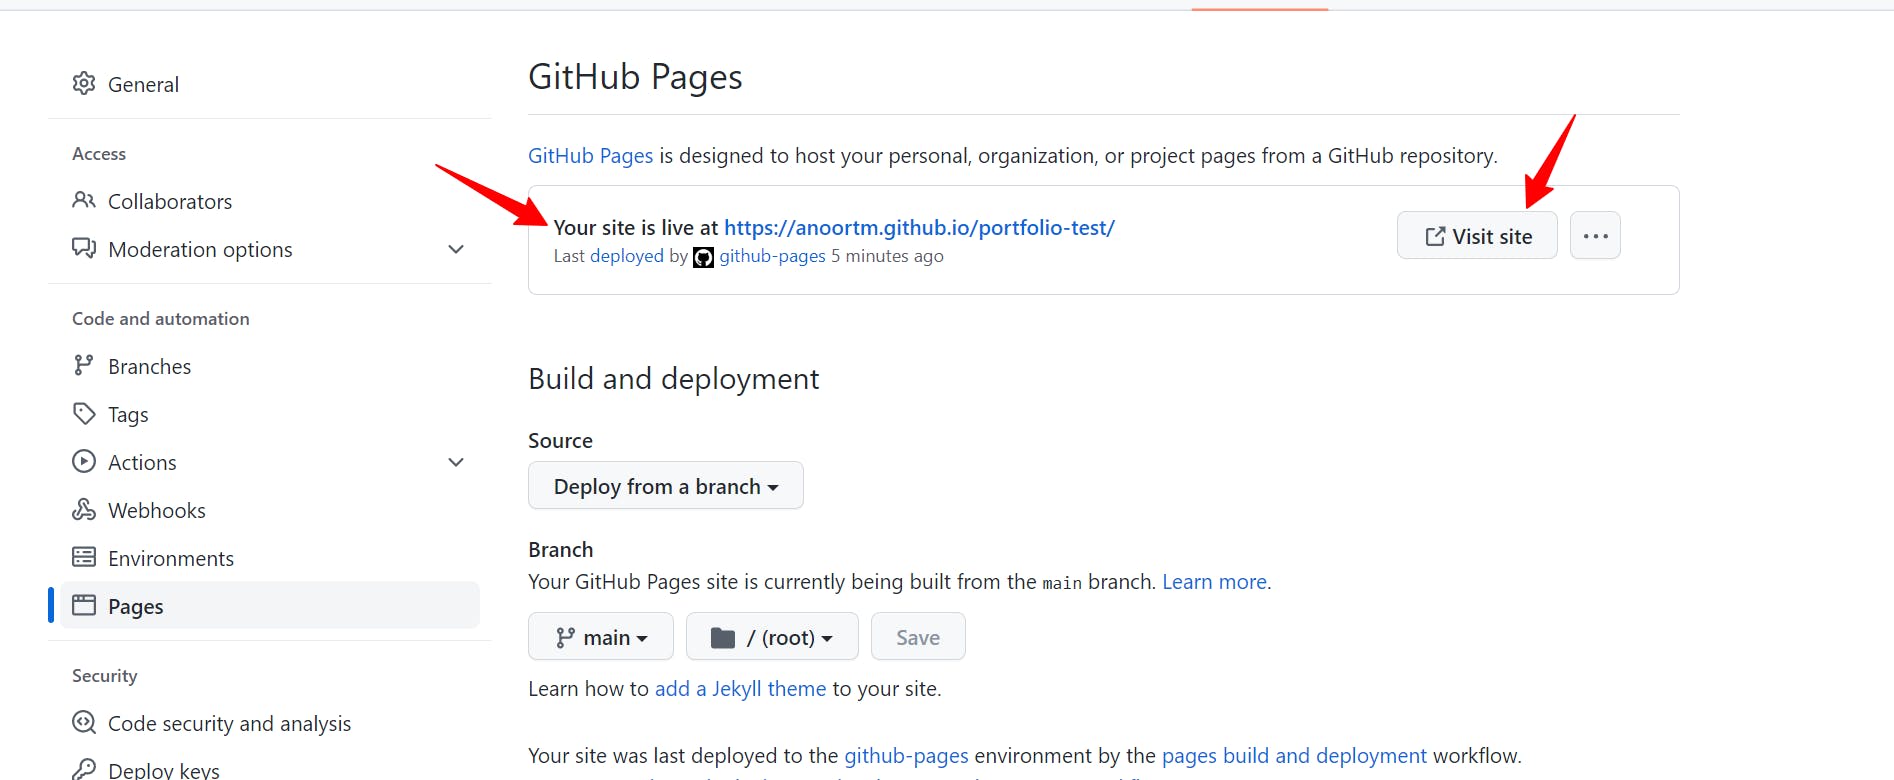
4. Find your website "link"
This is how you can find the link:👇
Click on your Repo > then go to Settings > click on pages.
You'll see the link of your website.
The link for my website is: "anoortm.github.io/portfolio".
In your case, the link would be: "YourGitHubID.github.io/YourRepoName".
YourGitHubID = Your username for your GitHub account.
YourRepoName = The name of the repository you created in the beginning of this tutorial.
In the screenshot below, you can see how & where the link would appear.
5. Upload your Website "Files"
Now that your website has gone live, you can access it via the link we got in the previous step.
But!
You'll see nothing.
Why?
Because there's nothing in the repo that you have had created.
So, we need to upload your website files to the repo.
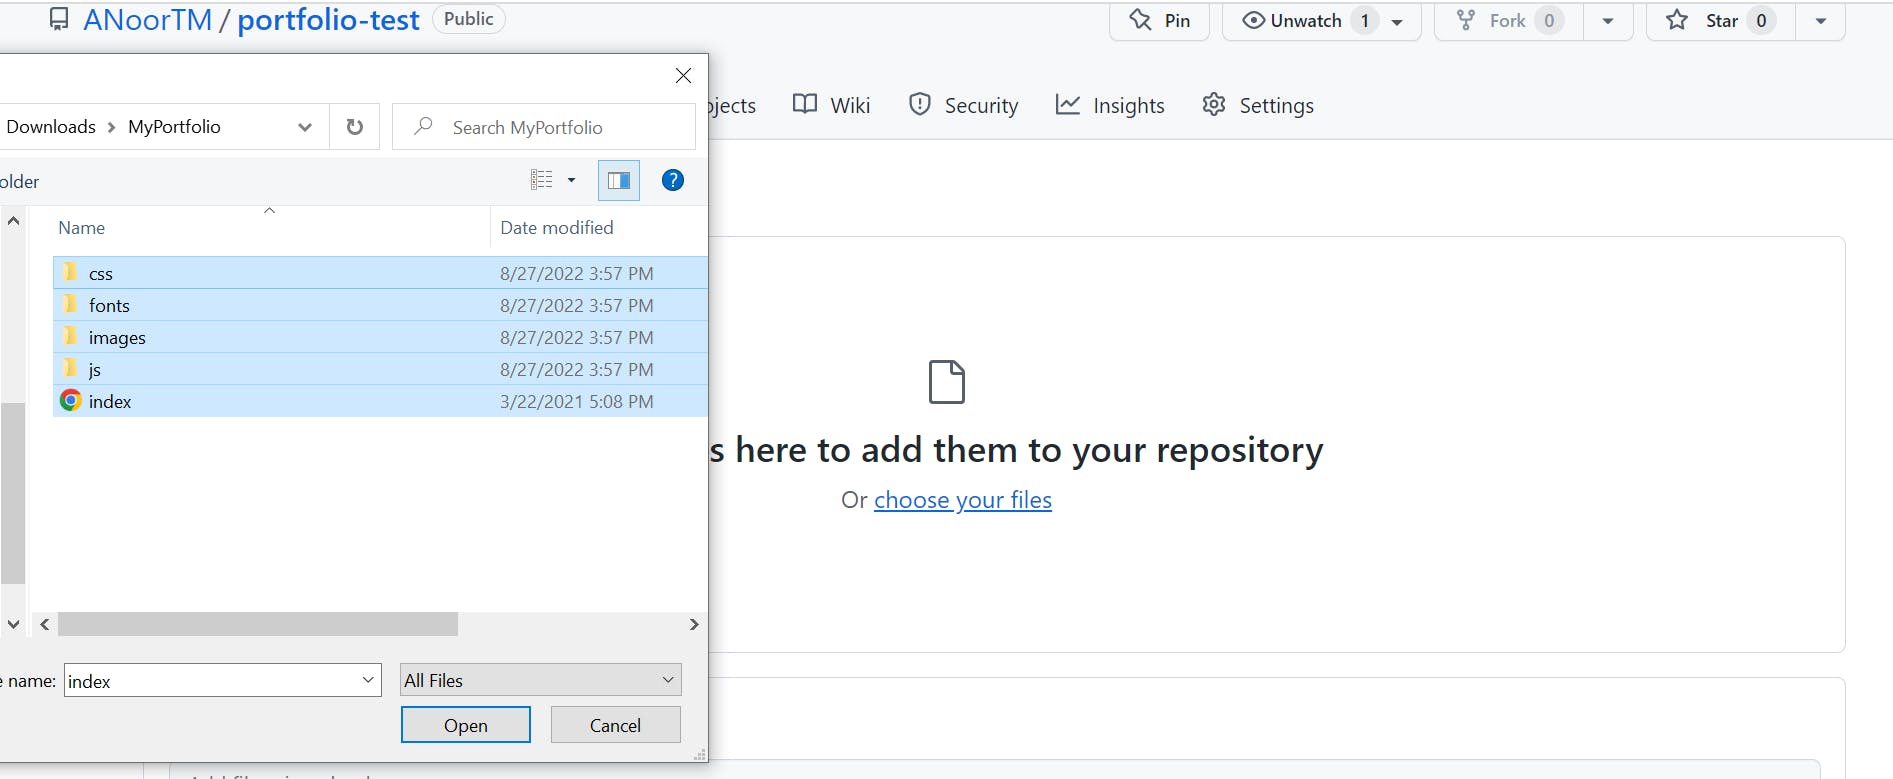
In order to do that, click on your repository name, and then click on "Upload" files.
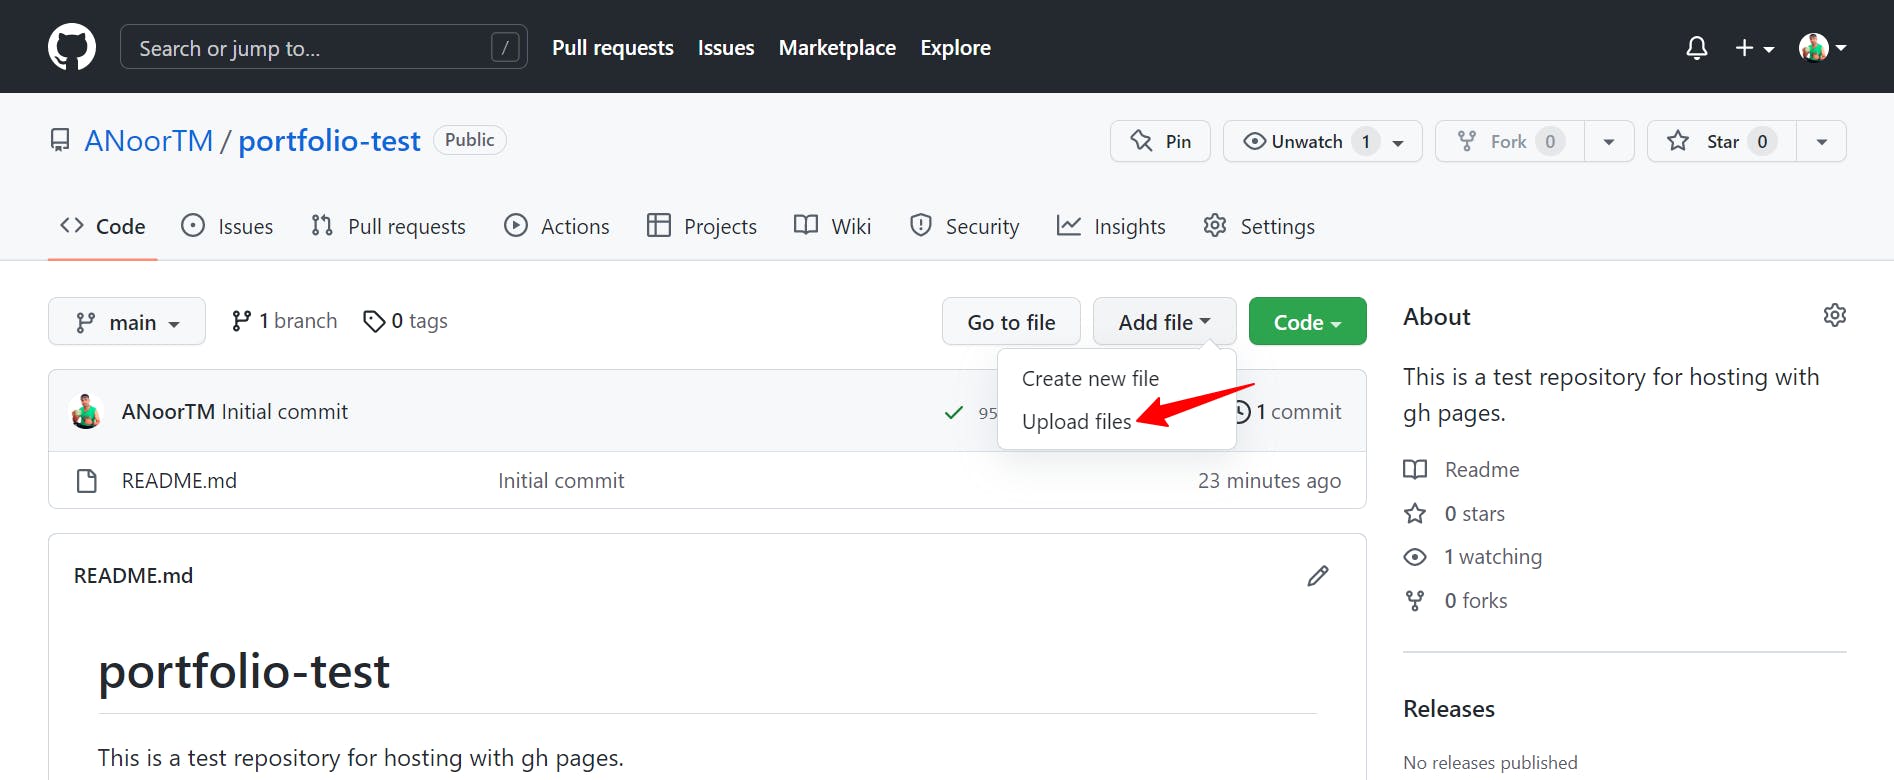
After clicking, you’ll see the following screen saying: “Choose your files”. Click on it.
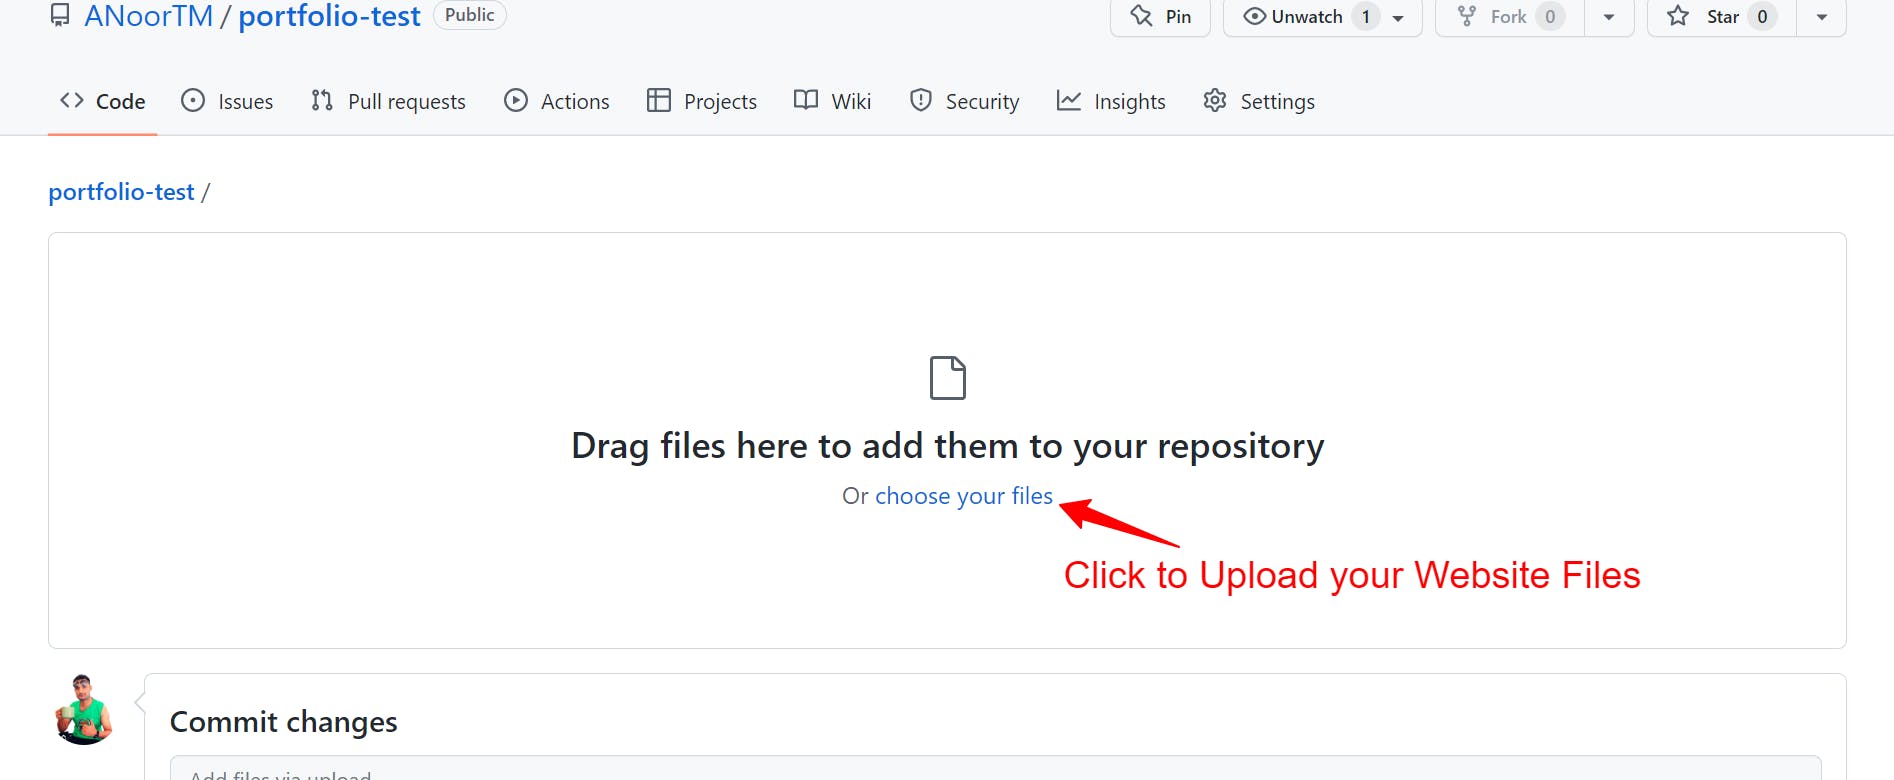
Navigate to the folder containing all your website files.
The files may include:
index.html (must have)
CSS files
JS files
Images
Other resources.
Select all files. Drag and drop them to your GitHub repo.
It may take some time depending on the size of your files.
And finally!
Don’t forget to click "Commit changes"!
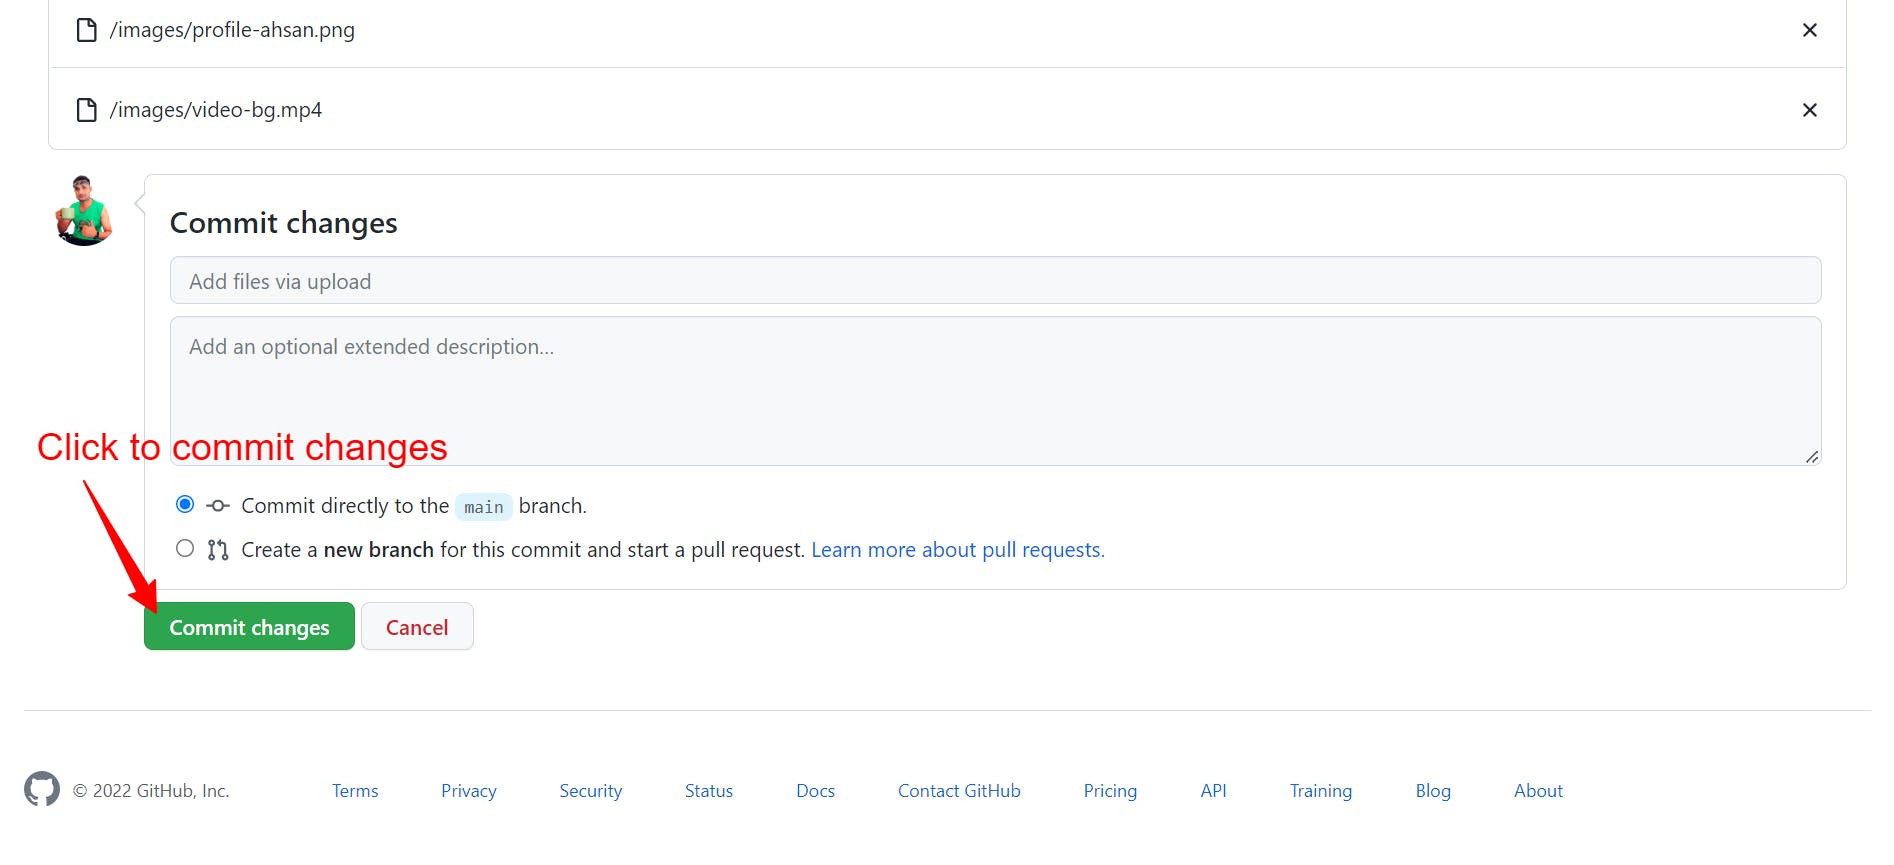
After "committing", you should wait for a while. It may take a some time to propagate the files.
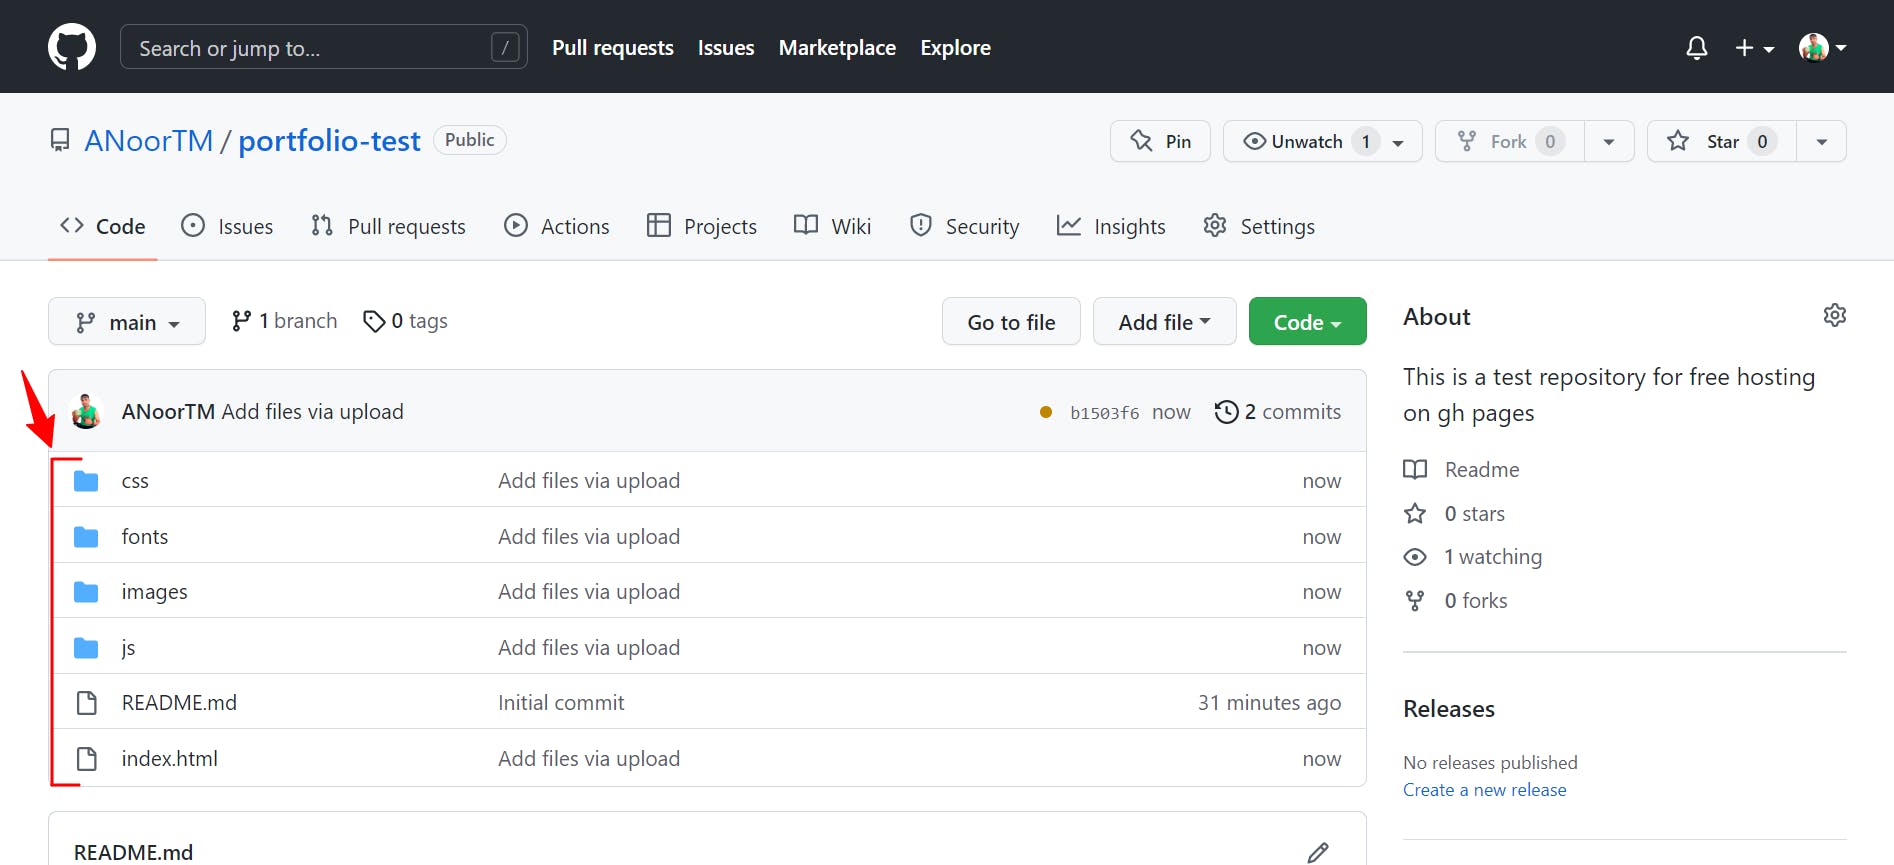
Aaand Boom!
Your website has been deployed. Congratulations!
But!!!
You’ll have to wait a few minutes, in order to let the website propagate through GitHub. After some time, you'll be able to access your website with the link we got earlier.
The best thing about hosting on GitHub via GH-Pages is that you will also get a free SSL certificate. That is, your website will be secure to browse.
Outro:
That's a wrap.
I hope you found some value in this post.
Connect with me on Twitter, and GitHub. So, you can get to see useful and latest content.
I create content around:
Web Development
Technical Writing
Personal Growth
Freelancing
Thanks for reading my blog, and see you in the next one (hopefully😅).